Home » Tutorials
Unity Game Programming Tutorials
Building our first Unity game from the ground up
Sorry for the delay, guys; I know I promised to put up a few more programming tutorials soon, but life got in the way. If you need to learn more, Unity's YouTube channel does a great job explaining some of the engine features, though absolute beginners to programming may find the explanations to be a bit too complex. Well, I am back in business now, and to make it up for you, I have decided to teach you how to create a very simple, and yet fully functional game from scratch.
We will use our PlayerMovement script as a base, creating a project in which the player moves around, collecting colored cubes and gaining points during the process. Sounds good to you? Then, let's get started!
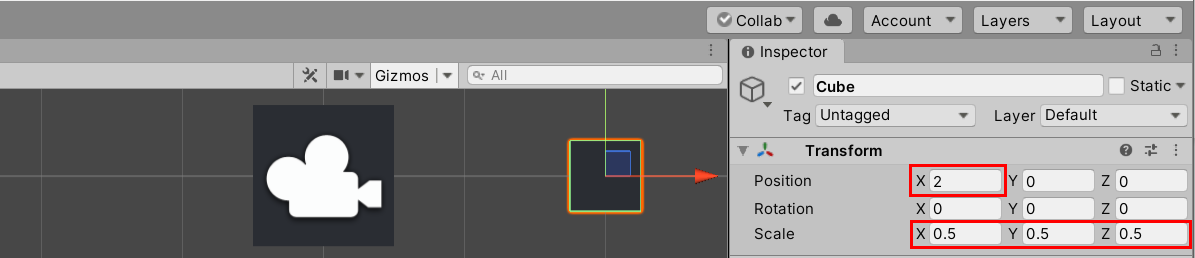
Load the previously saved Player Movement project, and then right click the Hierarchy view. Choose 3D Object, and then create a new cube. Assign its X position a value of 2, and then set the X, Y and Z scale values to 0.5; this way, it will be much easier to differentiate our collectible objects. Here's how the player and our cube will look like.
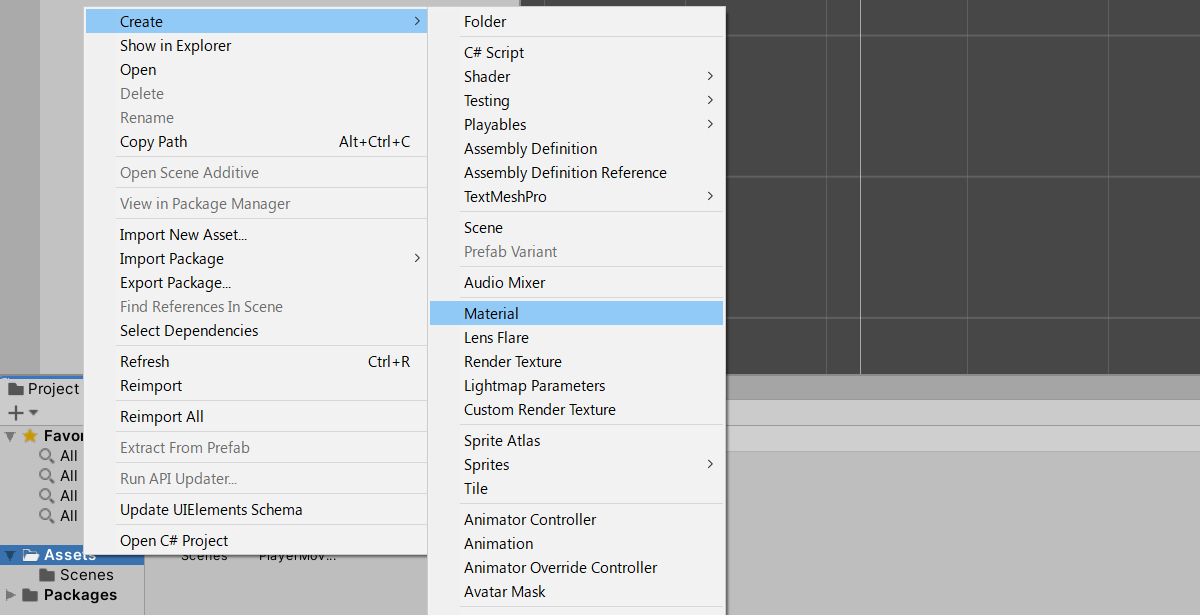
Let's create a new material for our tiny cube. Right click "Assets" in the Project view, and then choose Create, Material.
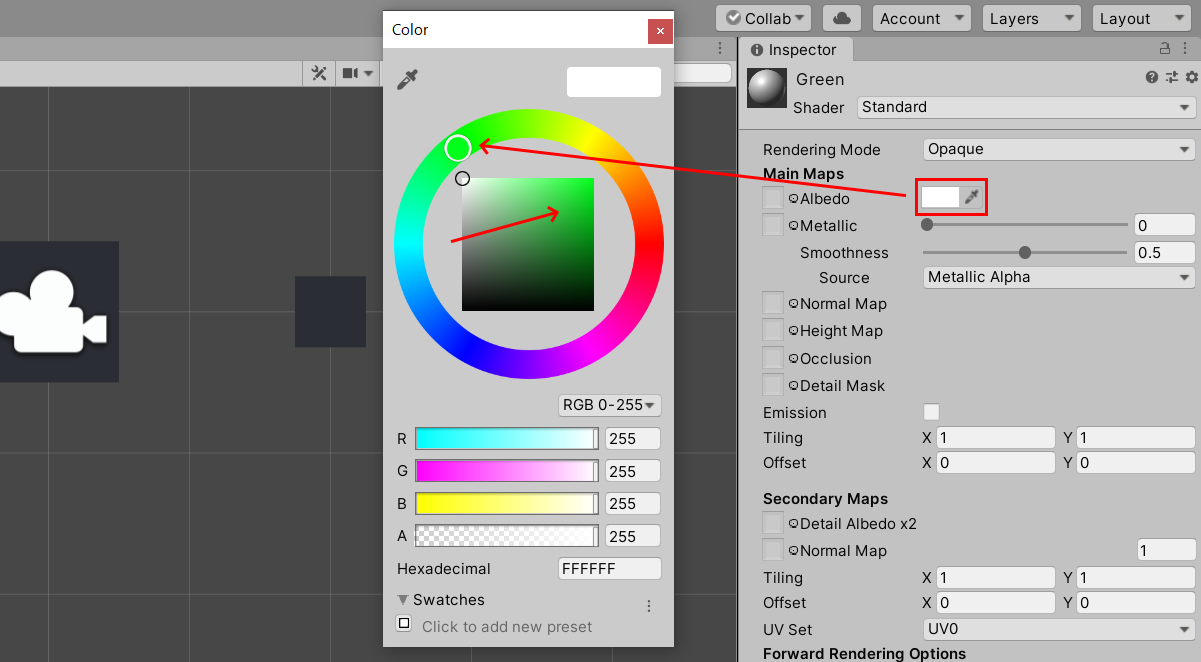
Give your material a descriptive name; I chose Green, because I want to design a material which uses this color as a base. Click the material's Albedo field in the Inspector, and then pick the desired color for it.
Adjust the strength of the chosen color by clicking the square in the center of the color wheel. Click the x in the upper right corner of the Albedo window when you are done, and then drag the material from the Project view's assets over the Cube in the Hierarchy window. If everything went ok, the tiny cube should change its color to green (or your chosen color).
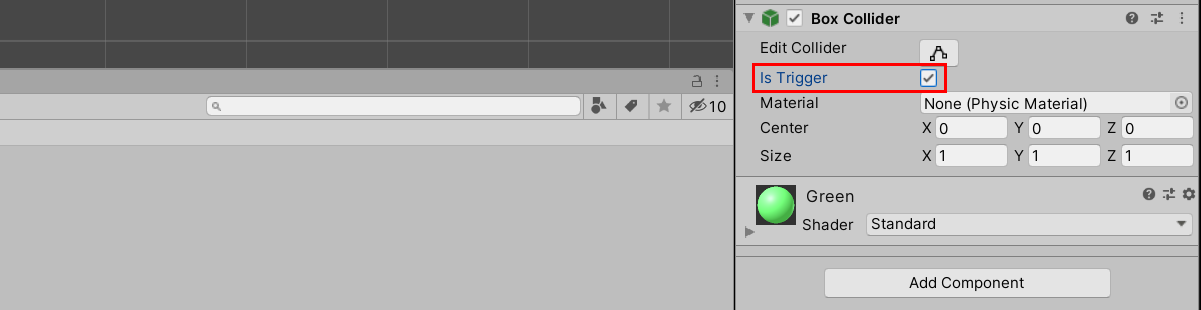
We need to ensure that our green cube reacts to collisions with other objects; this is done by setting its isTrigger flag in the Inspector.
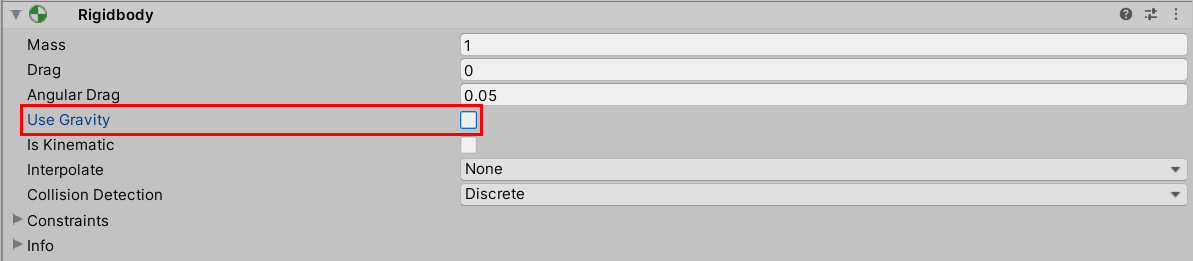
Then, we need to activate physics for this object. To do that, click the "Add Component" button at the bottom of the Inspector, and then choose "Rigidbody" from the list.
We don't want to keep gravity enabled for our green cube, though, because it would make it fall to the ground at game start.
Right click Unity's "Assets" in the Project view, and then create a new C# script; I chose to name mine "Cubes". Double click the newly created script to open it in Visual Studio, and then delete all the code inside the "Cubes" class.
Unity has a dedicated method called OnTriggerEnter which knows how to deal with collisions. So, we will only have to add a few lines of code to the script if we want to turn our cube into a collectible item.
public class Cubes : MonoBehaviour
{
private void OnTriggerEnter(Collider other)
{
if (other.tag == "Player")
{
Destroy(this.gameObject);
}
}
}
As you can see, the event is triggered when the cube collides with another entity. If that other entity is the player, the current cube ("this") will be destroyed, disappearing from the level for good.
However, Unity doesn't know that our big cube is the player yet. To fix that, select the player in the Hierarchy view, and then choose "Player" from the dropdown menu at the right side of the "Tag" label.
It's time to drag the "Cubes" script over our tiny green cube; this will assign the class to it. Run the engine by clicking the "Play" button, and then move the player using the WSAD or the cursor keys. The tiny green cube should disappear as soon as the player runs into it.
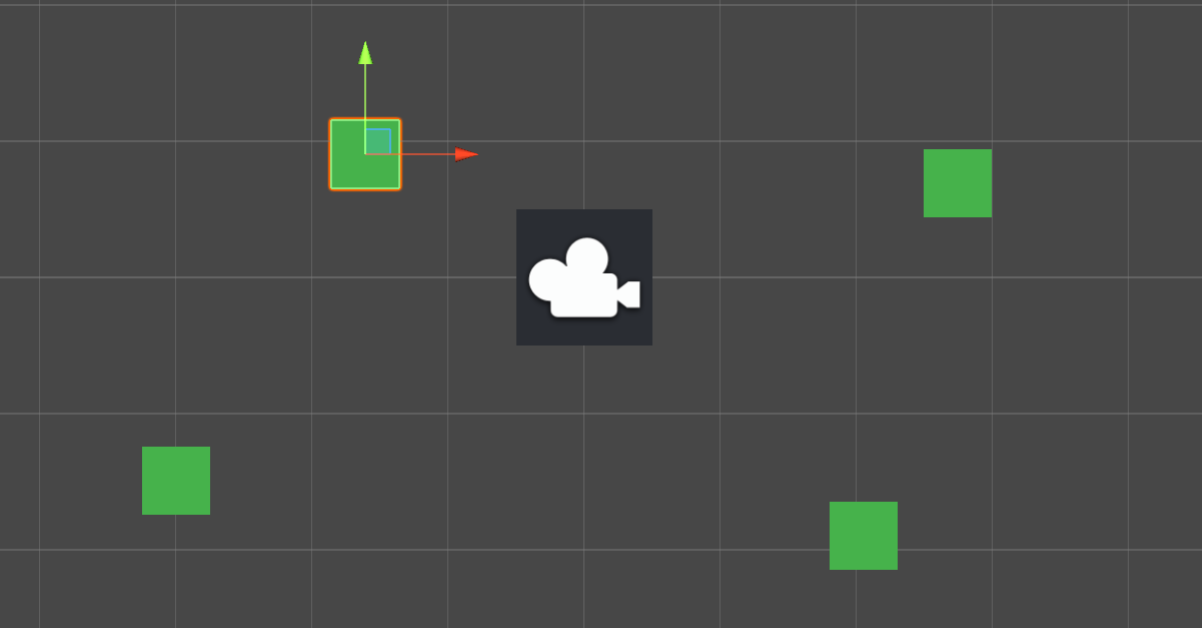
Stop Unity, and then select the green cube in the Hierarchy view. Right click it, and then choose "Duplicate". Repeat the process three times, until you have a total of four cubes in the level. Then, move them around the player in random positions; we will learn how to generate objects in random places in a future tutorial. Here is what I have gotten.
I chose to place my cubes close to the player, but you can use your mouse's scroll wheel to zoom out, and then place the tiny green cubes away from player's cube.
Run our simple game, and then move towards the green cubes to collect them all. Everything looks good so far, but I'd like us to learn how to create a simple score system before finishing this tutorial.
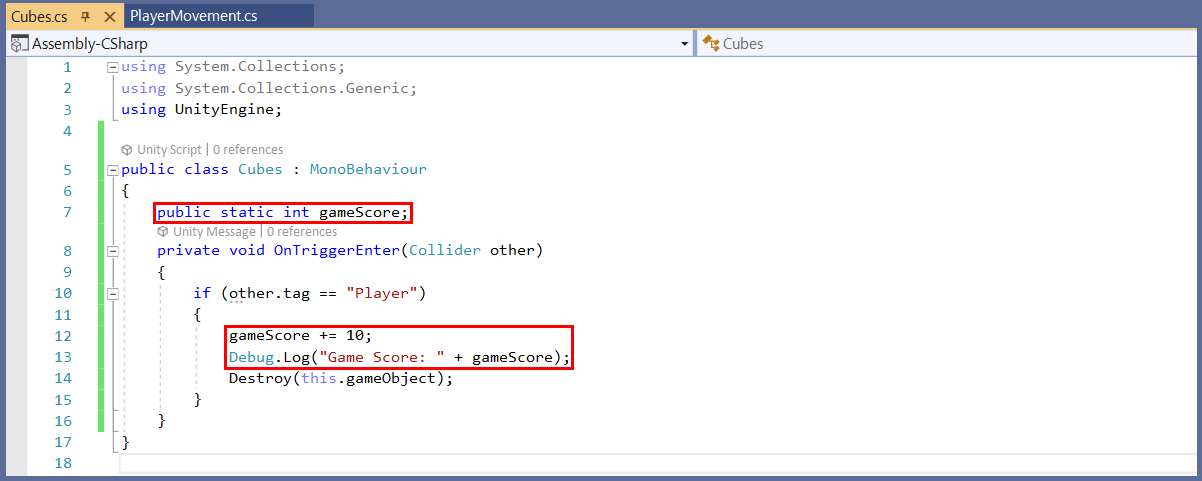
To make it happen, open the Cubes C# script file, and then add the lines which have been highlighted using the red color to it.
Here's what these new lines do.
public static int gameScore;
The code above declares a public variable named gameScore. It's an integer, because game scores are supposed to use integers, right? And it's a static variable, which means that we'll have a single copy of it, which will be shared with all our cubes. If we omit the "static" property, each object (green cube) will create its own gameScore variable, and this will make it impossible for us to add to a global score whenever we run into a new cube.
The following line of code adds 10 points to gameScore.
gameScore += 10;
It's the smarter equivalent of
gameScore = gamescore + 10;
Finally, this line of code displays the game score using the console.
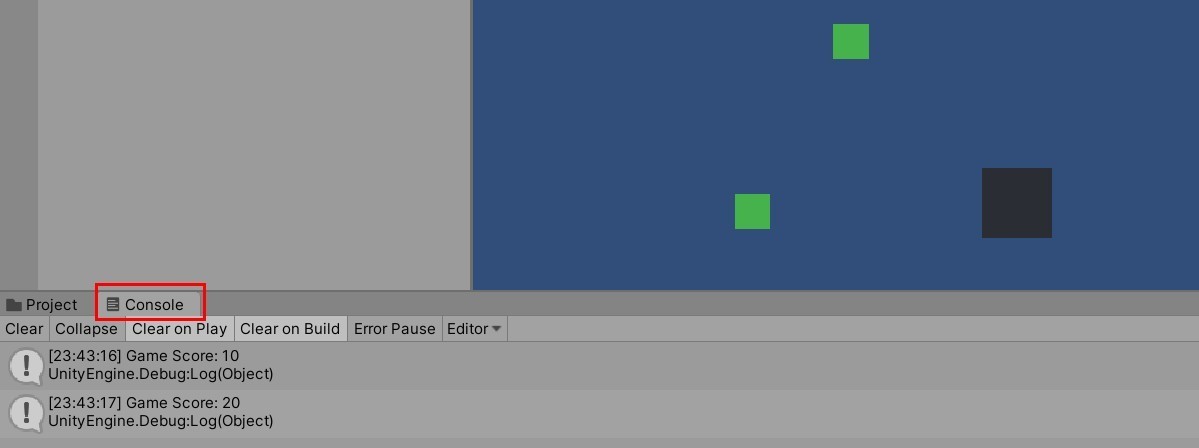
Debug.Log("Game Score: " + gameScore);
Unity's Debug.Log has been built with the goal of helping people debug their games, but we can also use it as a simple tool which displays various messages and values. In our case, the message consists of a "Game Score: " string, which is followed by the value of the gameScore variable.
To see the score, click the "Console" tab at the bottom of the screen, run the game, and then start collecting the green cubes; the gameScore value will change any time you run into a new cube.
I hope that you like this tutorial. I'll see you next time!