Home » Tutorials
Unity Game Programming Tutorials
Putting together a basic player movement script
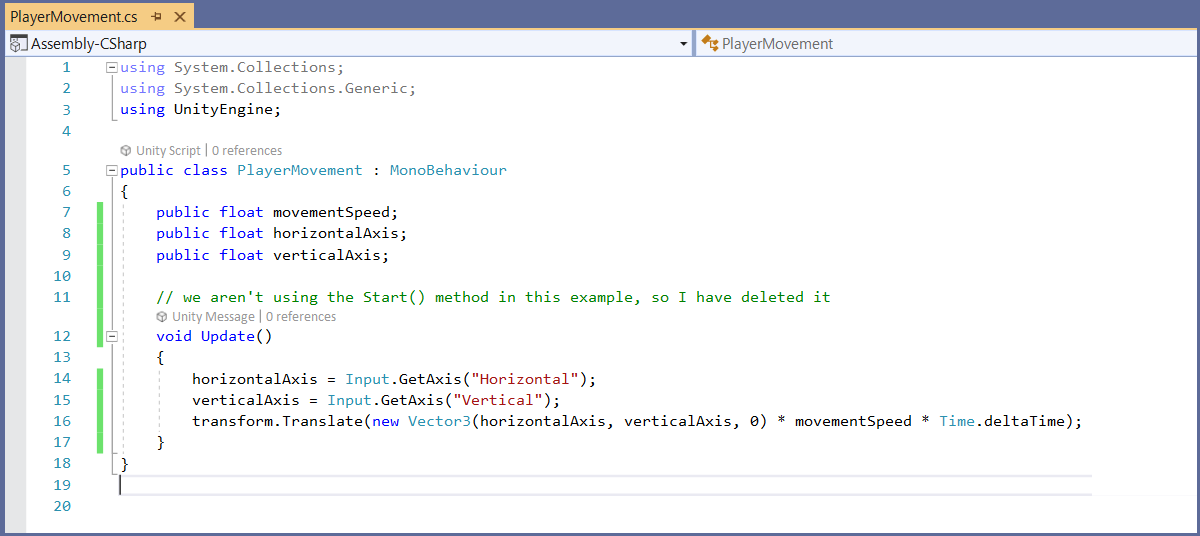
Trust me, we're going to learn a lot of stuff this time! But don't worry, we've got a very small C# code snippet to play with - see for yourself!
 Actually, if we ignore the "using" lines we've already discussed about, we will discover that PlayerMovement has less than 10 lines of code.
Our class begins with three similar float variable definitions. By the way, variables are just containers which can store various types of data.
public class PlayerMovement : MonoBehaviour
{
public float movementSpeed;
public float horizontalAxis;
public float verticalAxis;
C# can work with dozens of variable types, but most game developers use int (integer), float, char, bool, and a few more. A float variable uses 32 bits, allowing us to store huge numbers with a 7-digit precision.
You may have noticed that all our variables are public; this means that any other method can get access to them. That's not the best practice, though, because other functions may be able to change these values, and we don't want that to happen; nevertheless, if we make those vars public, we can then see them and set their values in the Inspector.
 Set any of these vars to private (replace "public" with "private") and you will see that it disappears from the Inspector view. To keep local variables private, thus following the best programming practices, and yet be able to get access to them in the Inspector, you should place a [SerializeField] instruction above each variable definition, just like I did it below.
[SerializeField]
private float movementSpeed;
[SerializeField]
private float horizontalAxis;
[SerializeField]
private float verticalAxis;
Set the value of movementSpeed to 3 in the Inspector, and then run the project; if everything works as expected, you will be able to move the cube using the WSAD and/or the arrow keys. Enjoy your creation, and then stop the project and let's explore the rest of the code, which is included in the Update() method.
void Update()
{
horizontalAxis = Input.GetAxis("Horizontal");
verticalAxis = Input.GetAxis("Vertical");
transform.Translate(new Vector3(horizontalAxis, verticalAxis, 0) * movementSpeed * Time.deltaTime);
}
The first two lines inside the Update() method are very similar. One of them is used for horizontal movement and the other one for vertical movement, so we'll only need to discuss the first one.
horizontalAxis = Input.GetAxis("Horizontal");
This line of code sets our previously defined horizontalAxis variable to the value that's retrieved by monitoring the state of the A, D, arrow left and arrow right keys. These four keys, which are used to control horizontal movement in most games, are also predefined horizontal movement keys in Unity.
When one of these keys is pressed, Input.GetAxis changes its value gradually either from 0 to -1 ("A" or the left arrow key have been pushed) or from 0 to 1 ("D" or the right arrow key have been pushed). The process repeats for the second line of code, which sets verticalAxis to a value that obtained by monitoring the status of the "W", "S", arrow up and arrow down keys.
I chose to use Input.GetAxis (and not individual keys) for this piece of code because it allow us to create a smooth player movement snippet without using too many lines of code. I could have built a similar system by making use of Input.GetKeyDown, of course, but the code would have been much more complex.
Let's examine the last line of code inside Update():
transform.Translate(new Vector3(horizontalAxis, verticalAxis, 0) * movementSpeed * Time.deltaTime);
As you already know, the transform component is attached to our player, controlling its position, rotation and scale. The Translate method will move the player in the direction given by the components of our Vector3. The first vector component (X) is set to our horizontalAxis variable, the second component (Y) is set to verticalAxis, and the third component is set to zero.
Those values are multiplied by movementSpeed, which is set in the Inspector and controls player's movement speed. The result is then multiplied by Time.deltaTime, which allows our program to run consistently on various computers.
Let's imagine that we run our marvelous player code on a computer that's only able to deliver 30 fps; this means that our Update() method would run 30 times each second. But what happens when we copy the program to a fast computer, which can run it at 100 fps? As you can probably tell, the player would move much faster if our application is installed on modern computers. By multiplying the movement by Time.deltaTime we can be sure that the movement stays consistent regardless of the frame rate.
I hope that you've learned a lot of stuff today. Keep visiting my site, because I'll a few more fresh tutorials for you in the near future :)